
Device Panel for Mobile Fleet
This guide is also available as a printable PDF.
In the box
- 1 x Device panel (R1045)
- 1 x Felt cover in the ordered color (Cast: C-Felt-Cast-0017)
- 1 x Camera bracket (R1046)
- 2 x Panel side wall (P209)
- 2 x Column anchor (P208)
- 8 x Pan head screw (F266)
- 2 x Knobs for camera bracket (P210)
- 2 x Cable manager (P118)
- 4 x M4 thumbscrew (F839)
- 4 x M4 thumbnut (F838)
- 1 x Velcro (F856)
Install cover anchor
Use the pan head screws included to install the panel side walls to the device panel as shown below.
Install the column anchor
Identify your display’s horizontal VESA pattern. Select the corresponding mounting holes on the device panel as shown, then install the column anchors with the included pan-head screws.
Install your camera
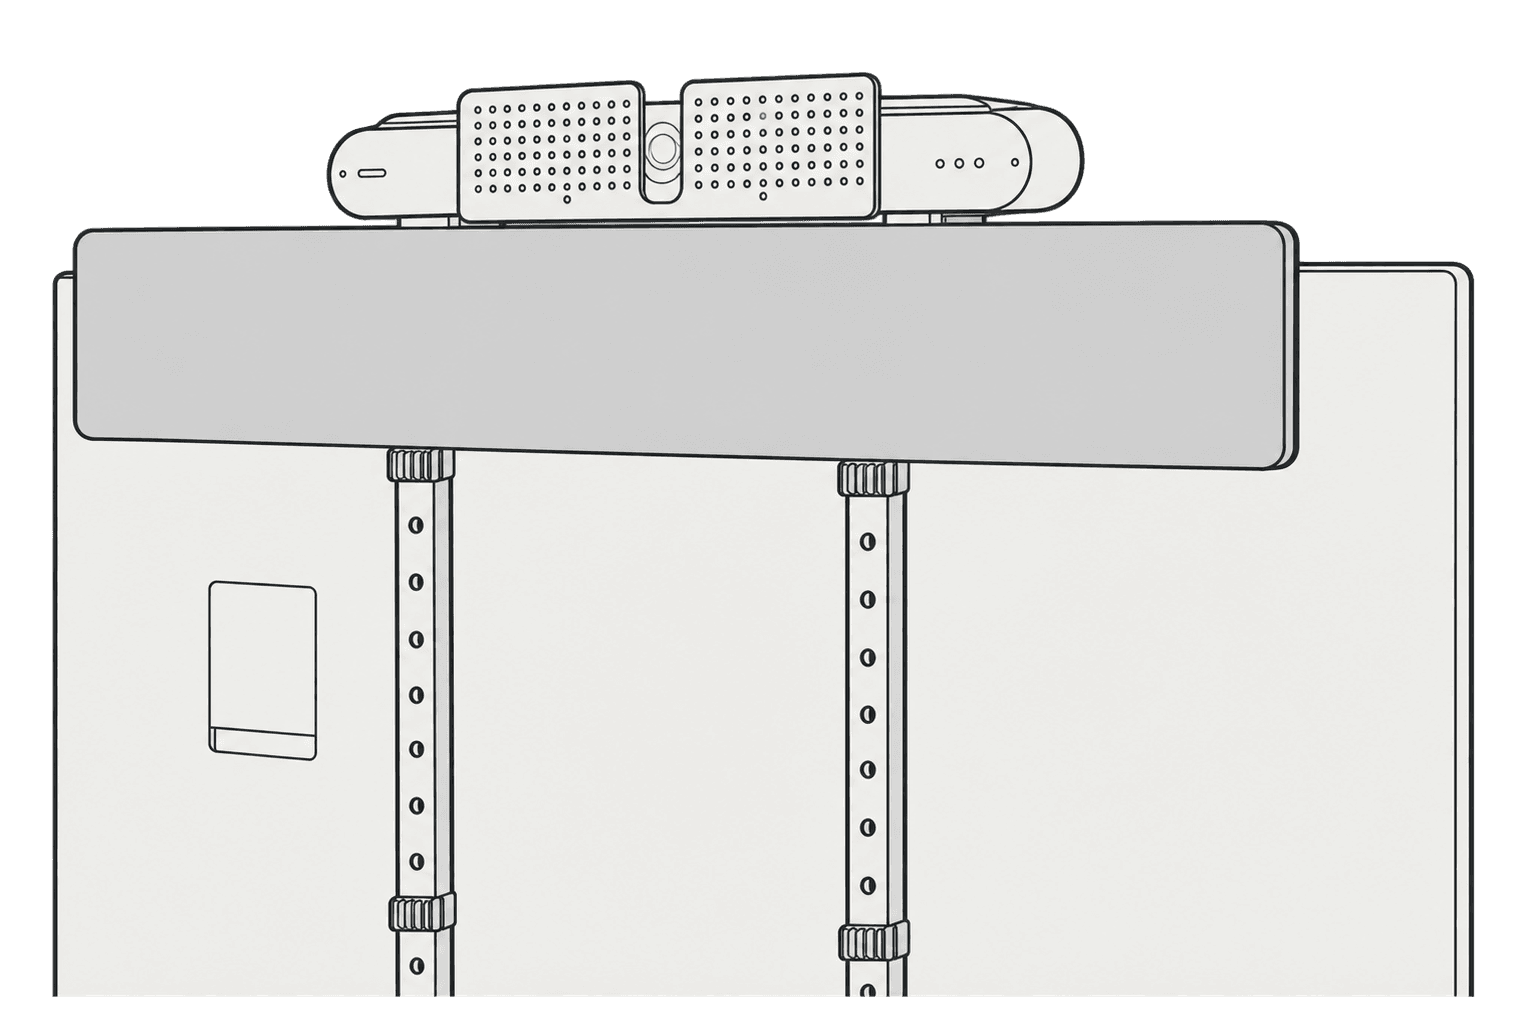
Use the knobs to install the camera bracket to the device panel as shown.
Camera above or below display
Install the wall mount of your video conferencing gear to the camera bracket with the M4 thumbscrews and thumbnuts as shown below.
Install and organize gear to the grid pattern
Use the included Velcro strap to install and organize gear and cables to the device panel.
Install to the column
Install the base and columns of your Mobile Fleet. Bring the device panel to the columns from the front. Align and insert the anchors into the selected column keyholes, then lower the panel into place.
Insert the cable managers from the rear of the columns to lock the device panel in place.
Install the cover
Install the display to the columns.
Install the video conferencing gear to its wall mount.
Align the cover holes with the projecting posts on the panel side walls, then press the cover into place.